Controlling & Viewing
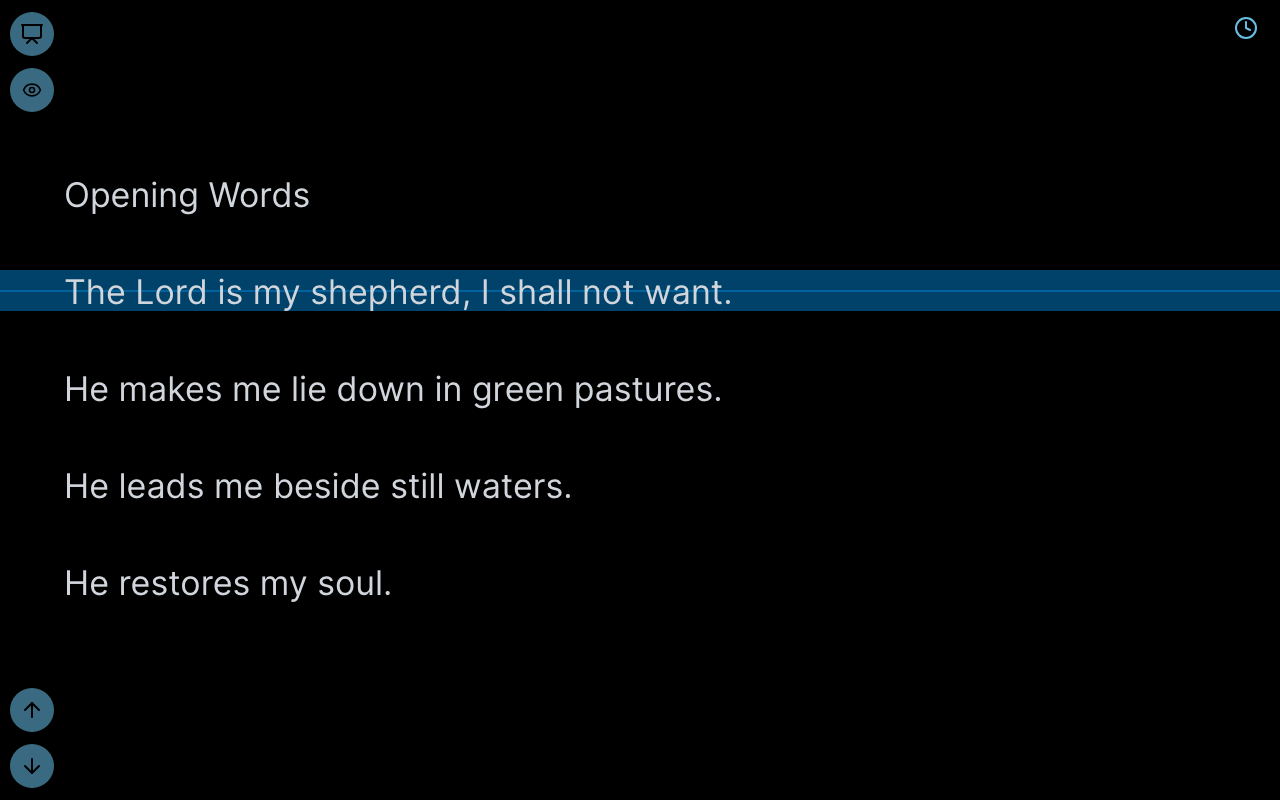
Presenting with Chapel Screen uses two windows: the Controller (what you see) and the Viewer (what your audience sees). They stay in sync in real time.
The Controller
The controller is your presenter's dashboard. Open it from the presentation editor or from the presentations list. Each place the presentation pauses is a stop — the controller's buttons are labelled Previous stop and Next stop. From here, you can:
- See your full presentation content with every stop marked
- Navigate forward and backward through the stops
- See which stop is currently active
- Blank the screen, start the timer, and switch to autoplay
Edits are live — if a collaborator changes text in the editor while you present, the controller and your audience see the update instantly.
The Viewer
The viewer is the read-only display your audience sees. Open it from the controller or share its URL directly. You would typically open the viewer on a projector or second screen.
The viewer renders your presentation with the applied theme — background images, colours, fonts, and all image slots. It automatically fills the available screen space and adjusts for different aspect ratios.
If your device is set to reduce motion, the viewer and controller jump between stops instead of scrolling smoothly, and panels and notifications appear without animation.

Keyboard Shortcuts
In the controller, use these keyboard shortcuts:
| Action | Shortcut |
|---|---|
| Next stop | → or ↓ |
| Previous stop | ← or ↑ |
| Toggle blank screen | B |
| Toggle search mode | G |
| Toggle fullscreen (controller and viewer) | F |
| Play, pause or replay the current video | Space or K |
| Skip the current video back / forward 10 seconds | J / L |
Search mode lets you scroll freely through the whole presentation to find a stop without moving the audience's screen; the button in the top-left corner of the controller toggles it too. Leaving search mode returns to the current stop.
Blank Screen
You can blank the viewer screen at any time from the controller. This is useful during breaks or when you want to draw attention away from the screen. Toggle it back to resume displaying content.
Autoplay
Autoplay automatically cycles through your stops at a regular interval. Activate it from the presentation menu in the controller. When autoplay is running:
- Stops advance every 8 seconds
- The presentation loops back to the beginning after the last stop
- All connected viewers stay in sync
- Press the autoplay button again to return to manual navigation
Autoplay is useful for lobby displays, rotating announcements, or unattended screens.
Playing Videos
When the current stop is a video, playback controls appear at the bottom of the controller, beside the stop buttons: skip back 10 seconds, play/pause, skip forward 10 seconds, the elapsed/total time, and a scrub bar. Playback is synchronised — every connected viewer and channel screen plays, pauses, and seeks together, staying within a fraction of a second of each other.
- When the video has played to the end, the play button becomes Replay — one tap starts it again from the beginning.
- Drag the scrub bar to jump to a point in the video; the time readout follows your finger and the viewers seek once you let go. Dragging on the controls never swipes to another stop.
- On a keyboard, Space or K plays and pauses, and J / L skip 10 seconds back / forward.
- The controller itself stays silent and shows only the video's poster image — the viewers do the playing.
- Navigating away from the video stop ends playback on every screen; coming back starts it afresh.
- Blanking the screen hides the video; unblanking shows it again at the point it has reached.
Getting Video Audio Working
Browsers block videos from playing sound automatically unless you've interacted with the page or allowed the site to do so. When a viewer screen can't play sound, the video starts muted with a "Tap for sound" button over it — one tap enables audio for the rest of the session.
For screens you set up once and leave running (a projection PC, a stream capture machine), allow the site to autoplay with sound so you never need the tap:
- Firefox — click the permissions icon next to the address bar on the viewer page (or go to Settings → Privacy & Security → Permissions → Autoplay → Settings…), find the site, and choose Allow Audio and Video.
- Safari — with the viewer page open, choose Safari → Settings → Websites → Auto-Play, find the site in the list, and choose Allow All Auto-Play.
- Microsoft Edge — go to edge://settings/content/mediaAutoplay and add the site under Allow.
- Chrome — Chrome has no manual per-site autoplay list. It learns instead: after you've played video
with sound on the site a few times (the "Tap for sound" button counts), Chrome allows sound automatically on future
visits. For a dedicated, unattended presentation machine you can also launch Chrome with the
--autoplay-policy=no-user-gesture-requiredflag to allow sound everywhere. - OBS / streaming capture — OBS browser sources allow sound automatically; no set-up needed for your livestream.
Tip: in a venue with several screens showing the same presentation, give only one device audio (the one feeding your sound system) and keep the others muted or with their volume down — multiple devices playing audio a fraction of a second apart sounds like an echo.
Highlighting the Current Stop
In continuous or block display modes, you can enable highlight mode to visually emphasise the current stop. This helps your audience follow along when several stops are visible at once.
Toggle the highlight from the presentation settings or channel toolbar.
Setting Up a Second Screen
The most common setup is to have the controller on your laptop and the viewer on a projector or external monitor:
- Open the controller in your browser
- Click the viewer link to open the viewer in a new tab
- Drag the viewer tab to your second screen and make it fullscreen (press F11 in most browsers)
- Switch back to the controller tab on your main screen
Everything stays in sync over your network connection — the controller and viewer don't need to be in the same browser or even on the same device.
Surviving Refreshes
Your current slide position, blank screen state, and autoplay setting all survive page refreshes. If your browser reloads or you briefly lose connection, you'll pick up exactly where you left off. This also applies to the countdown timer.