Presentation Settings
Open the presentation settings from the ellipsis menu (⋮) in the editor toolbar. The settings panel has three tabs: Theme, Options, and Sharing.
Naming Your Presentation
The presentation name appears at the top of the settings panel. Click on it to rename your presentation. The name is used in the presentations list and when searching.
Theme Tab
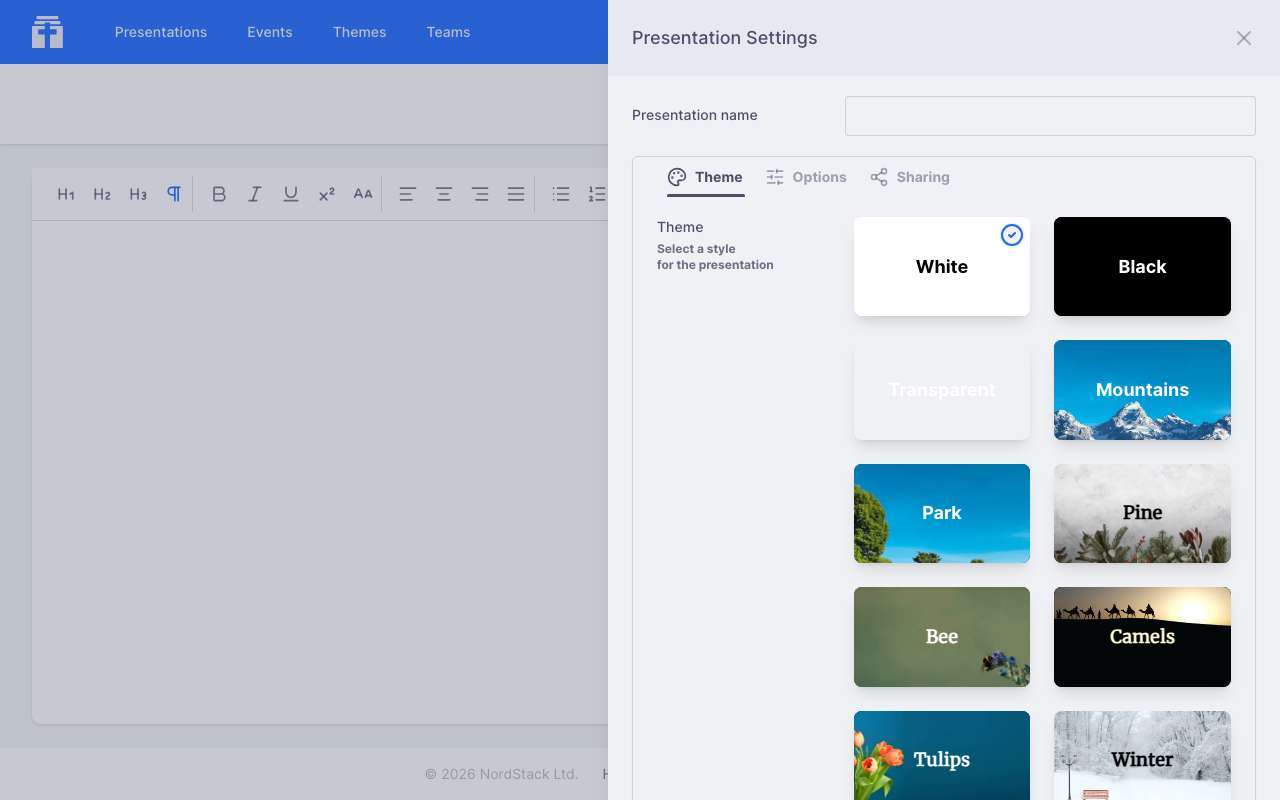
Choose how your presentation looks by selecting a theme. You'll see a grid of available themes — both the built-in system themes and any custom themes you've created or have access to through your teams. Click a theme to apply it; a checkmark shows which one is currently selected.
For more on creating your own themes, see the Custom Themes section.
Options Tab
The Options tab controls how your presentation content is displayed on screen. These settings affect all viewers and channels unless a channel overrides them.
Text Size
Controls how large text appears on the viewer screen. Choose from three presets:
- Small — fits more content on screen, good for text-heavy presentations
- Regular (default) — balanced for most uses
- Large — maximum readability, ideal for song lyrics or short announcements
Slides
Controls how your content is split into visual slides:
- Individual (default) — content is split into slides at soft page breaks when it would overflow the screen. This gives a traditional slide-by-slide feel.
- Continuous — all your content appears in a single scrolling view. Only hard page breaks create visual separations. The viewer scrolls to keep the current presentation point visible.
Reveal
Controls whether upcoming content is visible or hidden:
- Show All (default) — all content on the current slide is visible at once. The audience sees the full slide while you navigate through presentation points.
- Hide Upcoming — only content up to the current presentation point is visible. Lines appear one by one as you advance, keeping focus on what you're currently presenting.
Slide Content
Controls how many lines of content appear on each slide. This only applies when slides are set to Individual mode and devices are in landscape orientation.
- Auto (default) — the layout engine decides how much fits on each slide based on the screen size
- Block — each section between soft page breaks becomes its own slide
- Four — up to four lines per slide
- Two — up to two lines per slide
- One — one line per slide, for maximum impact
Highlight
When enabled, the current presentation point is visually emphasised with the theme's highlight colour. This helps your audience follow along when multiple points are visible at once — particularly useful in continuous mode or when reveal is set to show all.
Header and Footer
Turn on Hide the header and footer to show the slides without their header and footer — a song's copyright notice or a Bible passage's reference, for example. Every screen showing the presentation hides them, and the content can then use the space to the edges of the screen. The editor still shows them, so you can edit them whatever this option says. To hide them on one channel only, such as a stage screen, use the channel's Options override.
Sharing Tab
Teams
Share your presentation with any team you belong to. All members of that team will be able to view, edit, and present it. You can share with multiple teams at once, and remove a team's access at any time.
Privacy
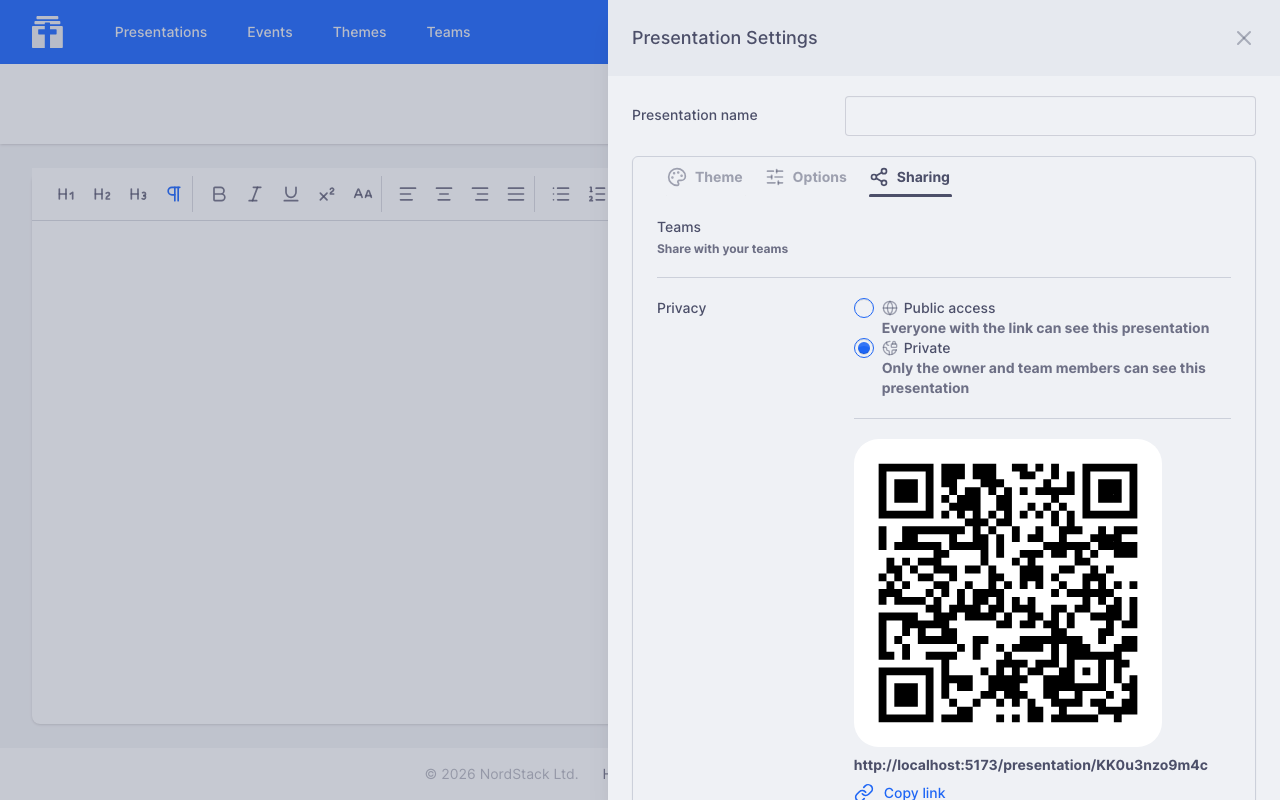
Controls who can view your presentation via its link:
- Public access (default for a new presentation) — anyone with the link can view the presentation in read-only mode
- Private — only you and members of teams you've shared it with can see it
A private presentation is marked with a padlock: beside its title in the editor and the controller, on its card in your presentations and on the dashboard, and in its row on an event page. Click the padlock to open the presentation's settings on this Sharing tab.
The Sharing tab also shows a QR code and direct link you can share with others.
For more on working with teams, see the Teams section.